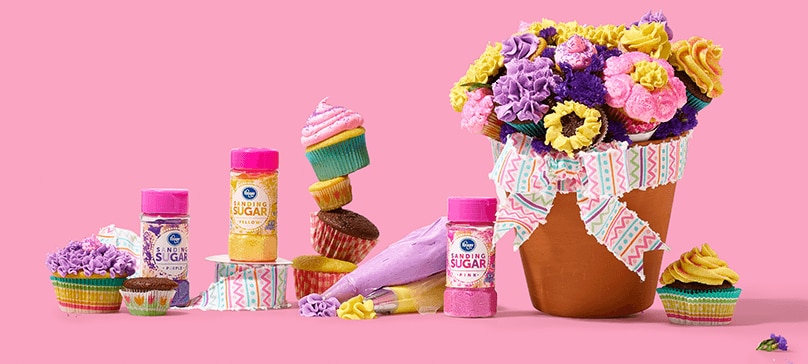
Make a Cupcake Bouquet
Flowers and other traditional gifts are a surefire way to brighten any day. This year, however, how about swapping out flowers for something that‘s sweet enough to eat? We’re talking about a cupcake bouquet—a best-of-both-worlds feast for the eyes and treat for the taste buds. All it takes is cupcakes, frosting, a few easy-to-get, inexpensive materials, some time and a creative spirit.
What you’ll need:
- Cupcake tin.
- Paper cupcake liners.
- Cupcake and frosting ingredients (see recipes and shortcuts below).
- Food coloring (optional).
- Styrofoam ball* and container for holding Styrofoam (wide vase, terracotta pot, or cachepot). Make sure the ball sits securely on your base.
- Toothpicks (appetizer toothpicks are slightly longer and sturdier than regular toothpicks).
- Paper cups (optional but recommended), as close as possible in size to the diameter of a cupcake.
- Glue gun or other glue (optional).
- Piping bags for frosting (an alternative to piping bags would be to simply cut the corner off of a plastic baggie).
- Decorating tips.
- Green tissue paper or green cupcake liners.
*A Styrofoam ball 5 inches in diameter will accommodate 9 or 10 cupcakes. Choose the diameter that best fits your container and the number of cupcakes you’d like to include.
Choose your recipe
If you enjoy baking from scratch, use your favorite cupcake recipe. Whether you make vanilla, chocolate, or another flavor is up to you. Using a store-bought mix is fine, too.
Pro tip: If you really want to save time and effort, buy ready-made cupcakes from the Bakery. (You may want to place an order ahead of time and ask the Bakery to hold the frosting.)
You’ll also want to use your favorite buttercream frosting recipe. The frosting will have to be stiff enough to use with the piping bag and decorating tips—if it’s too runny, you’ll end up with some very droopy flowers…and that’s no good.
Don’t have a favorite recipe? Try this one.
Pro tip: It’s OK to use store-bought frosting! But homemade makes your bouquet even more special.
Build your bouquet
Once you’ve gathered your supplies and have your cupcakes ready, you’re ready to become a cupcake florist. Follow these steps:
- Place the Styrofoam ball on your container. Make sure it’s a good fit—the ball should sit solidly in your container’s opening.
- Cut off the bottoms of the paper cups, leaving the sides about an inch high.
- Glue cups onto the Styrofoam ball, starting along the edge of your container and working up and around. Place the cups as close together as possible until the entire ball is covered.
- Push 2 or 3 toothpicks through the bottom of each cup and into the foam ball, leaving about ½” to ¾” of the toothpick sticking up.
- Place a cupcake into each cup and onto the toothpicks.
Alternate method: Using paper cups ensures that the cupcakes will stay put—this is especially important if you’ll be transporting the bouquet. However, you can skip that step and poke your toothpicks directly into the Styrofoam, two or three per cupcake, and then push each cupcake onto the toothpicks. This is where the sturdier appetizer toothpicks can come in handy.
Decorate!
Now it’s time to turn your cupcakes into beautiful blooms.
Pro tip: Practice making your buttercream flowers on a flat surface to get the feel of it.
- If you want a colorful bouquet, divide buttercream into separate bowls and tint with food coloring to reach your desired hues.
- Cut bottom of piping bag and insert star tip.
- Place the piping bag into a glass and fold down the top of the bag over the sides of the glass.
- Add about ½ cup of buttercream.
- Twist the top of the bag tightly. Use a rubber band or twist-tie to secure, if you’d like.
- Hold the bag against the palm of your hand, vertical to the cupcake.
- Starting in the center of the cupcake, squeeze the bag gently about ¼” from the surface.
- Continue squeezing as you slowly move the tip in a circular motion from the middle outward until you complete the rose shape. Stop squeezing and pull the bag up and away. Repeat with each cupcake, alternating colors as you desire.
- Add “leaves” by twisting small squares of tissue or green cupcake liners. Tuck leaves into spaces between cupcakes.
Pro tip: It’s easiest for beginners to use a small piping bag. Look for the 8" or 10" size. Or cut the corner off of a small plastic baggie.
More inspo:
- Stick a florist-style note in your bouquet.
- Decorate the pot or vase with a ribbon.
- Intersperse some real flowers in your bouquet. Statice or waxflower would be great choices. Just make sure the flowers are nontoxic!
- Instead of a vase or flowerpot, create your bouquet in a decorative basket.
Present your surprise
A cupcake bouquet is sure to make anyone’s day special. It’s almost too pretty to eat (but too yummy not to).
Go back to the Mother’s Day Shop

